/
Publishing a Portlet
Publishing a Portlet
Documentation provided by Lakshmi Maktala, Project Coordinator, from Oakland University
Select Portlet Type
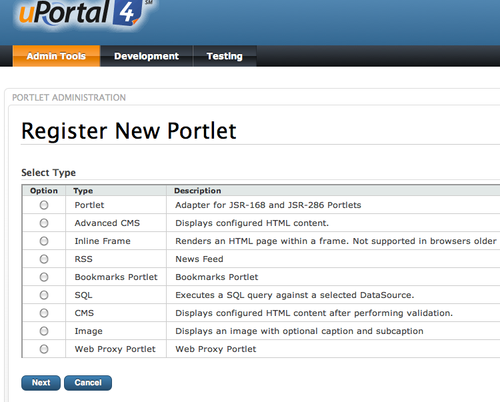
- Define the portlet under Portlet Administration. Select "Register New Portlet", click on the "Portlet" option and click the "Next" button at the bottom of the page.
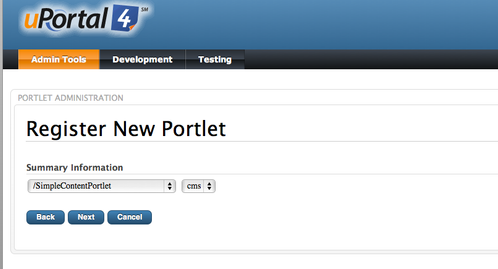
- Select your new portlet from the drop-down menu and click "Next" (example demonstrates SImpleContentPortlet, but select your portlet under the drop-down)
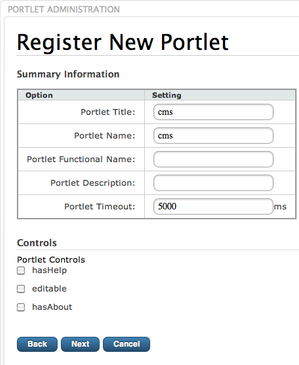
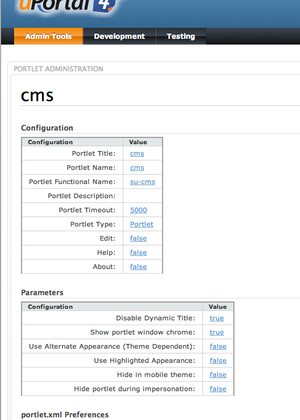
- Fill out the Summary information for your new portlet and click Next (See example below).
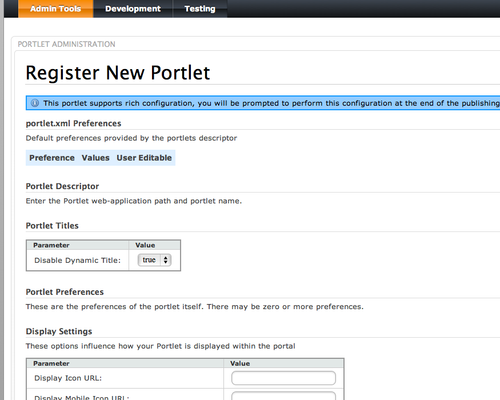
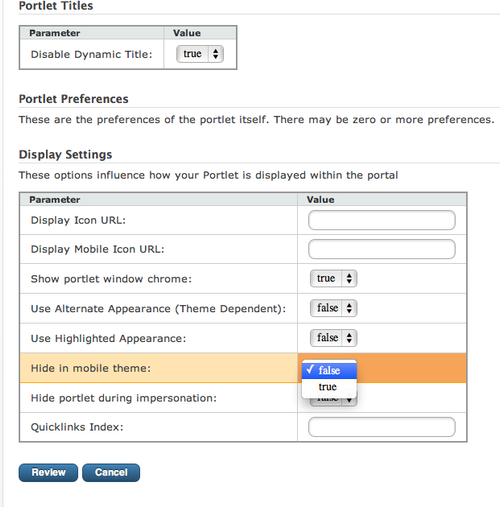
- Fill out the portlet.xml Preferences and click Next. (See images below)
- If you are using the mUniversality mobile view (see How to Turn On the mUniversality Mobile View) and you want to hide your portlet from the mobile theme you can set the preference "Hide in mobile theme" to "true". (see image below).
- Note: You may need to "Empty Cache" to see the results. Go to the "Portal Administration Tools" and click on the "Manage Cache instances", then click "Empty All Caches" and test the mobile view to verify that it is being hidden by following the "Changing the User Agent" documentation located at How to Turn On the mUniversality Mobile View.
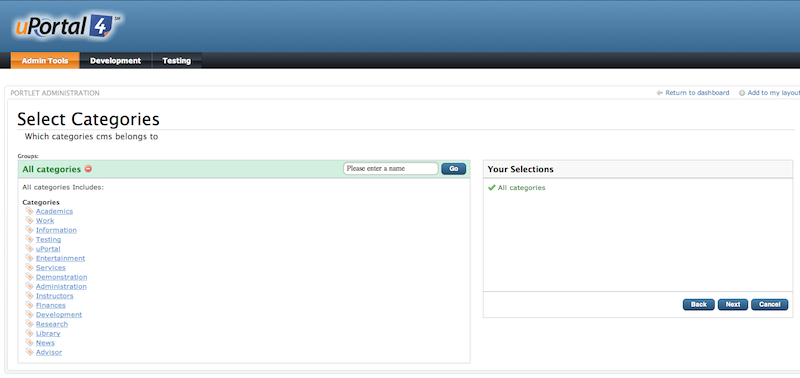
- Select Categories which your portlet will belong to and click Next. (See image below)
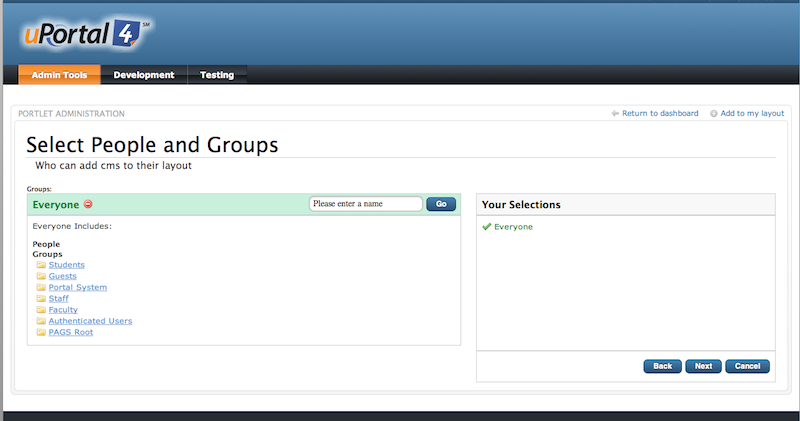
- Select the People and Groups who can add your new portlet to their layout and click Next. (See images below)
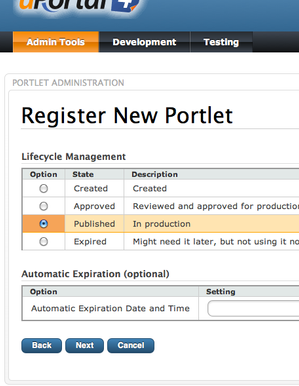
- Fill out the Lifecycle of your new portlet and click Next
- Fill out any necessary Configurations on your new portlet, confirm that everything is set accordingly and click Save (See images below)
Portlet Icon URL
The media/skins/icons directory (source tree: uportal-war/src/main/webapp/media/skins/icons) is a common place to include additional icons. You should find a selection of icons there already.
It's also possible to switch the default icon. Currently the default is hard-coded in this file...
uportal-war/src/main//webapp/media/skins/common/javascript/uportal/up-layout-gallery.js
(but this setting should probably be refactored into a property somewhere.)
Add the new portlet
- Add the new portlet to the a layout by clicking on "Customize"
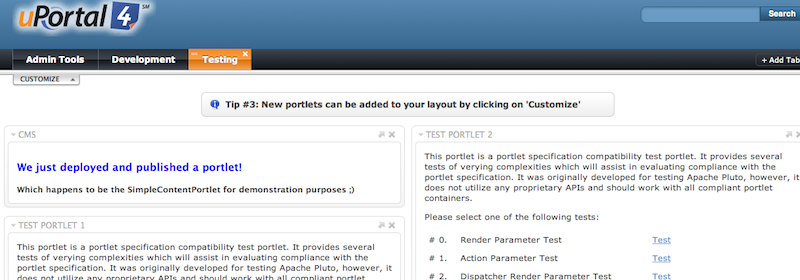
- Browse using the arrows to the right or Search using the input field under "Stuff" to locate your new portlet. Now, select the portlet by hovering over it and click on the "Add" click to add it to your layout. (See image below using cms (SimpleContentPortlet), as the demonstrated portlet)
- Now, your portlet has been added (See image below)
, multiple selections available,
Related content
Publishing a Portlet
Publishing a Portlet
More like this
Deploying a Portlet Application
Deploying a Portlet Application
More like this
CSS Best Practices
CSS Best Practices
More like this
Portlet Administration
Portlet Administration
More like this
Portlet Modes
Portlet Modes
More like this
Permissions on Portlets
Permissions on Portlets
More like this
