The following instructions are the second part of defining fragments. Check out the first part of this tutorial, which will take you step-by-step to defining a new fragment.
The following documentation is based on Dan Biondi's (Sacramento State) contribution on the topic. Thanks.
Step 1: Log into uPortal as an administrator
Log into uPortal with an account that contains administrator permissions where you have access to the Fragment Administration portlet.
Step 2: Select a fragment from 'Fragment Administration'
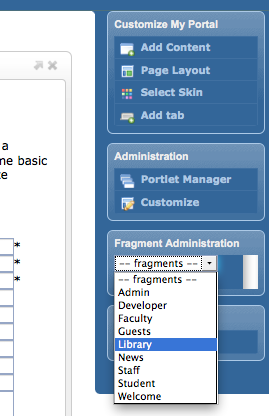
If you followed the first section of the tutorial (define a fragment), after we created a new fragment (Library) and restarted uPortal you now see the new fragment under the drop-down menu.
- Select one of the fragments from the list to customize the layout. (See image below)
|
Step 3. Add a tab
- From the Customize My Portal portlet, click Add tab. (See image above to view the Customize My Portlet portlet)
Step 4. Customize the Page Layout
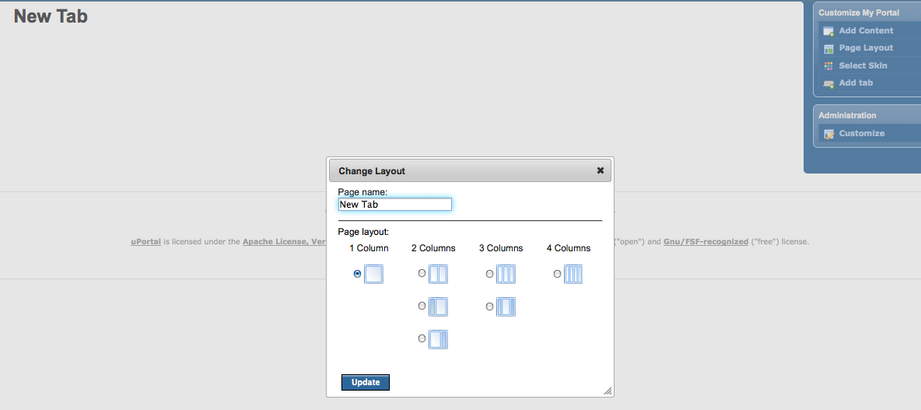
- Click Page Layout from the Customize My Portal portlet
- Change Page name to desired tab name and specify the page layout for the new tab. Once complete, click Update
|
Step 5. Add Content
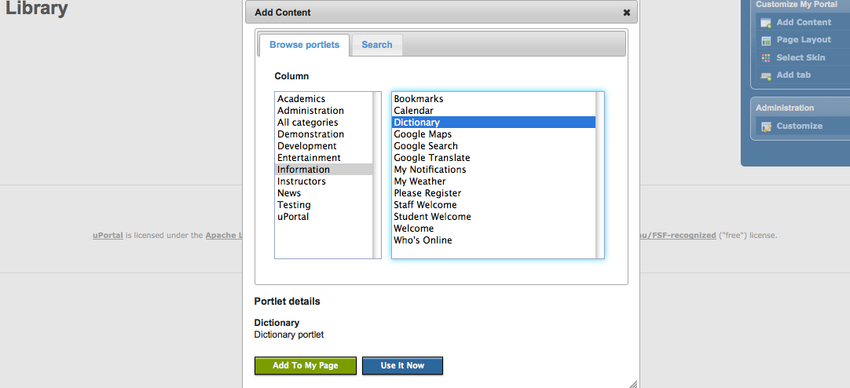
- From the Customize My Portal portlet, click Add Content.
- Browse for content and click Add To My Page (see image below)
- Repeat for all desired portlets to be in the tab
|
Step 6: Customize the content
As an administrator you can customize your content by locking down portlets set in your tab layout. You can restrict users from removing content or move the layout of content on the page.
- Under the Administration portlet, select Customize
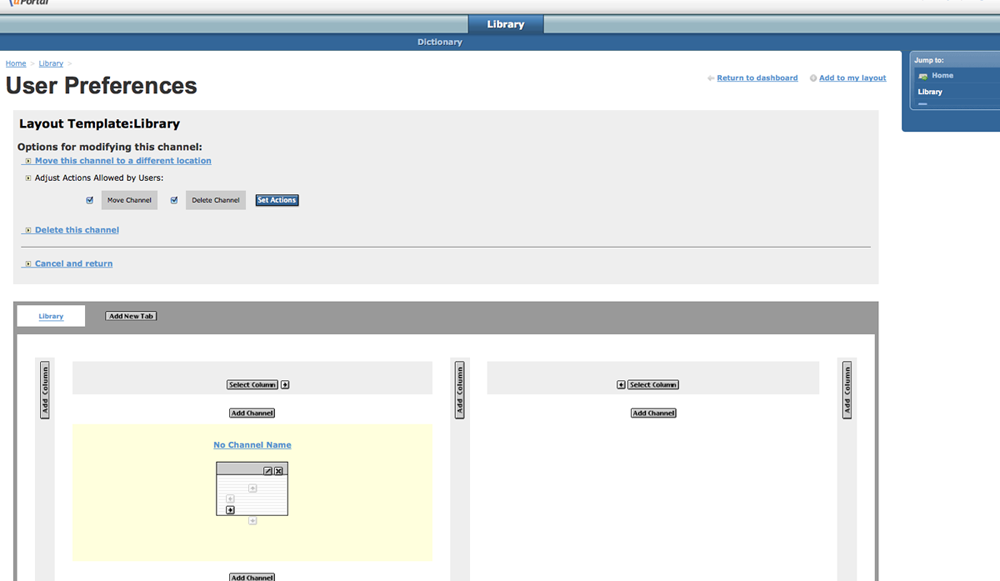
- From the User Preferences screen, Set "Options for modifying this channel" for each channel by clicking on the pencil icon
- Select the options you wish to allow users to perform (Move Channel, Delete Channel) by checking/unchecking and click Set Actions. (see below)
|
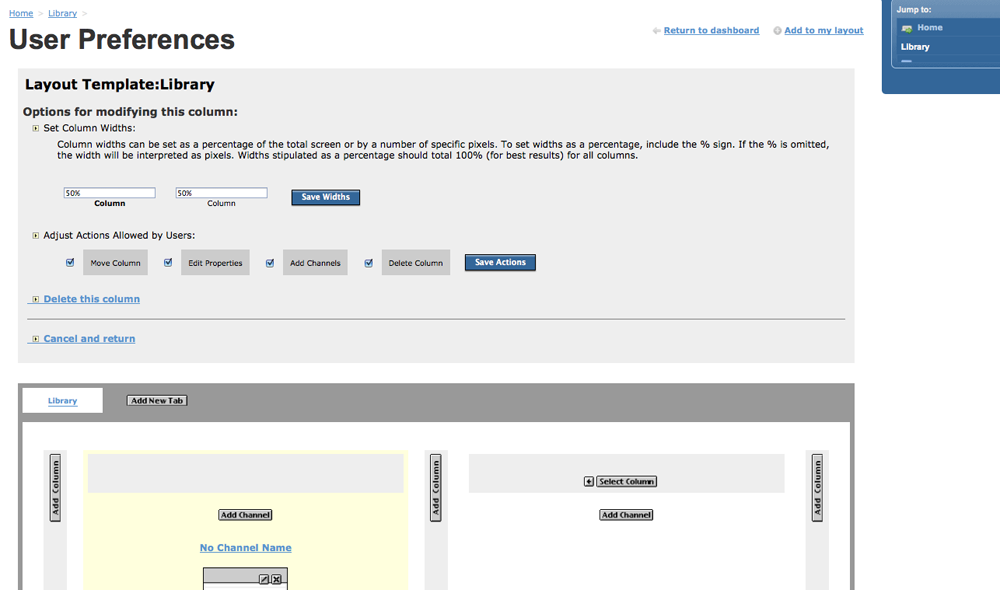
- Set "Options for modifying this column" for each column by clicking on the Select Column button (see image below). Now you can delete the column, adjust the width of the selected column and specify if the user may move, delete, edit properties, add content to the column. Click Save Widths and Save Actions respectively when you are finished.
|
Step 7: Sign out
Sign out after you have completed setting up the layout of your fragment.
A tomcat restart is necessary for changes to the Guest fragment.
